Flashings
What are flashings?
Flashings are a barrier of impervious material, built-in to prevent moisture movement to any part of a building requiring protection (usually the part below it). It includes a waterproof strip barrier around an opening in a wall or, at a roof junction, or at a roof penetration to prevent the ingress of water to the inner parts of a building.
Flashings for metal roofs must be the same metal as the roof sheets, fixed or built into an abutment to form a weathertight joint. There are many different types and geometries.
The terms flashing and capping are often used interchangably.
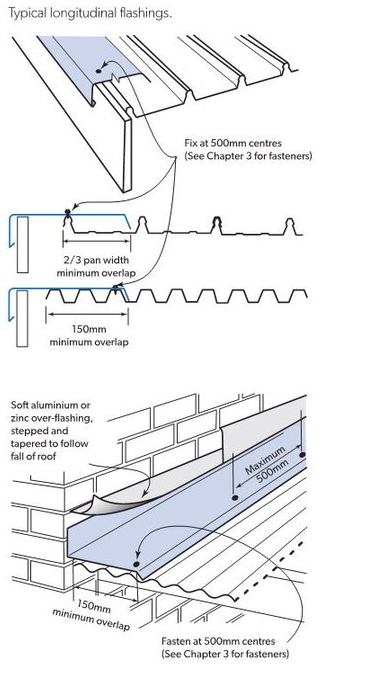
What are longitudinal flashings?
Longitudinal flashings run parallel to the pans or valleys and are made to suit the cladding profile. They must have an edge turned-down that dips into the pan or valley.
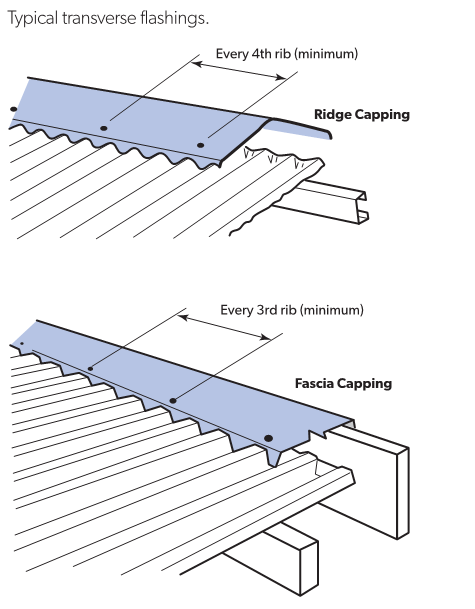
What are transverse flashings?
Transverse flashings run across the pans or valleys They usually have a stiffening lip along the lower edge, which is turned down to dip into the pan or valley.
To maximise weatherproofing, the bent lip is commonly fashioned (such as notching or scribing) to fit the profile.
Typical transverse flashings include ridge capping, fascia capping and parapet flashing.
Why is flashing important?
Flashings provides continuity of the cladding and makes a building watertight. Wind can drive rain hard against wall flashings, so it is important that attention is paid to the detailing of flashings around windows, doors, re-entrant and external corners (particularly near the edge of a building where wind pressure can be greater than elsewhere), to ensure a watertight and aesthetically appealing building.

General
Flashings must:
- Overlap between under & over flashings by 50 to 75 mm
- 75 mm minimum overlap to cladding
- Have laps with a minimum of 25 mm wide with:
- Sealant between the sheets
- Sealed rivets or screws at max. 40 mm centres
- Always lapped in the direction of flow
- Cover the roof sheeting by not less than two ribs
- Be installed at wall abutments
- Be folded to shed water - 10⁰ minimum fall
- Have additional continuous support framing at max. 200mm centres if capping and flashing have a width over 150 mm
- Have an air gap to the roof sheets
- Be sealed with an appropriate sealant.
- Consider additional fixing in situations of higher exposure to wind
- Have fasteners which are:
- Located to minimise the length of unsecured overhangs
- Located along both long edges of the flashings
- Fastened by some other method (e.g. clips, overlapping stiffening strips, other suitable restraint) where an edge cannot be secured by fasteners
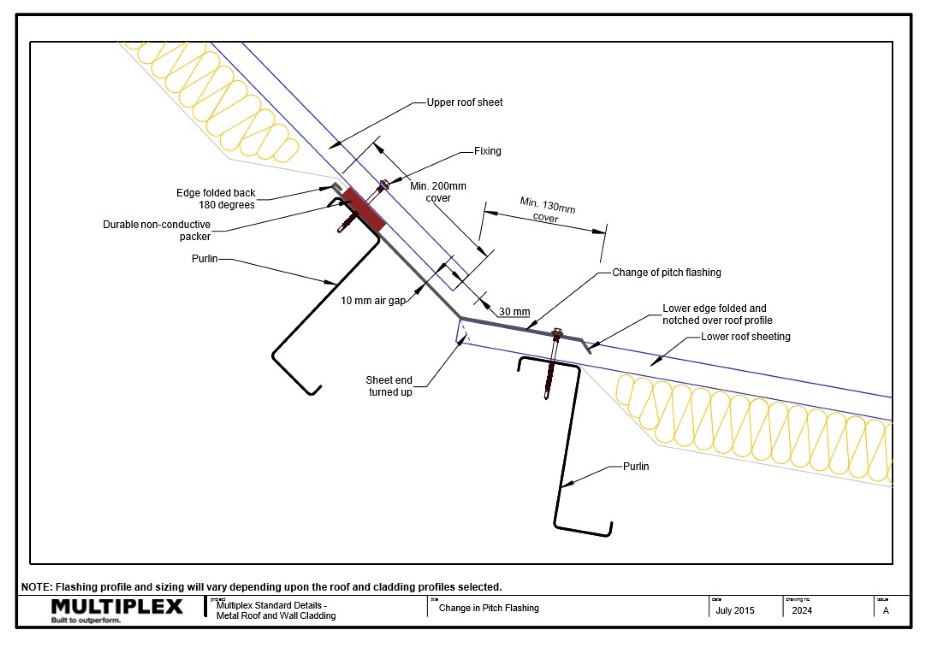
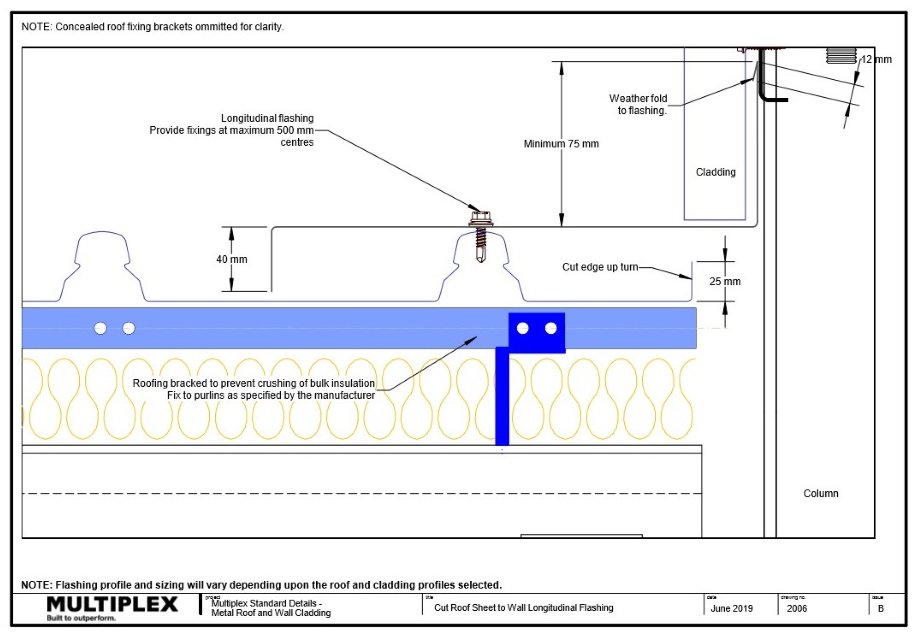
Longitudinal Flashings
Notes:
- Provide fixings at a maximum of 500mm centers
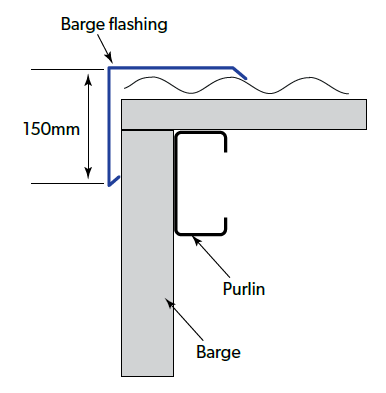
- Minimum turn up of 75mm
- Roof bracket is required to prevent crushing of bulk insulation. Fix to purlins as specified by the manufacture
- Turn up cut edge of roof sheet a minimum 25mm
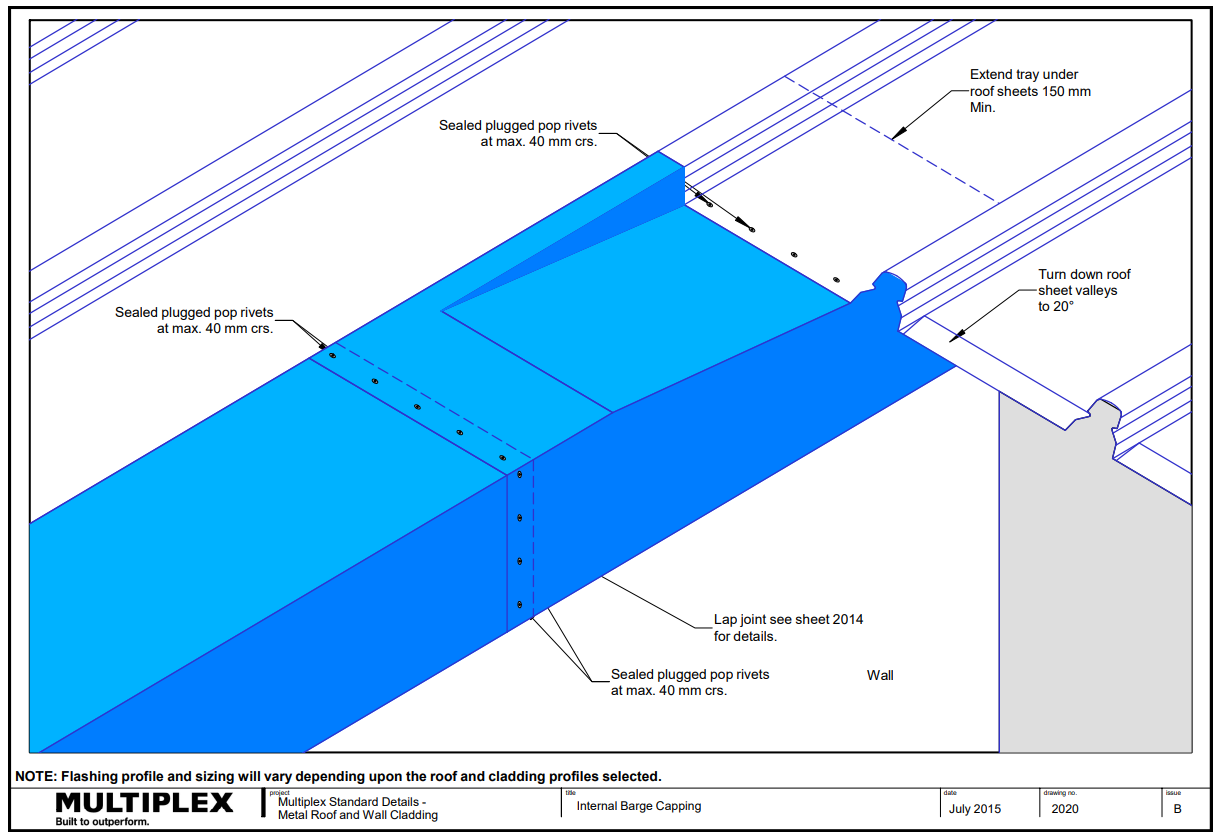
Lap Joints
Overlaps of transverse flashings must be sealed with a recommended sealant and fastened.
Note:
- Use only neutral cure silicones.
- Check the label to confirm suitability
- Ensure surfaces are clean and dry before application.
- Screws and rivets at max. 40mm centers.
- Aluminum rivets to be a minimum diameter of 3mm.
- Aluminium rivets subject to high shear loading shall be a minimum 4.8mm diameter.
- Always apply sealant in a continuous bead along the center line of the fixings.
- Do not entrap air in the joint.
- Only use screws with weatherproof seals or sealed rivets.
- Ensure the fasteners are compatible with the metal and sealant.
- Ensure fasteners are of the correct exposure grade.
Note: QLD Only
- Single lap joint not to be used for box gutters where made of more than one length of sheet.
- Double lap joint to be used for box gutters where made of more than one length of sheet
Procedure:
- Assemble, clamp and drill holes for rivets.
- Separate components, remove swarf.
- Clean joint surfaces as specified by the sealant manufacturer.
- Apply a bead of sealant.
- Relocate components immediately following sealant application.
- Press together to extrude sealant from both edges.
- Insert rivets or screws.
- Immediately after completion of the joint wipe off all excess sealant and swarf.
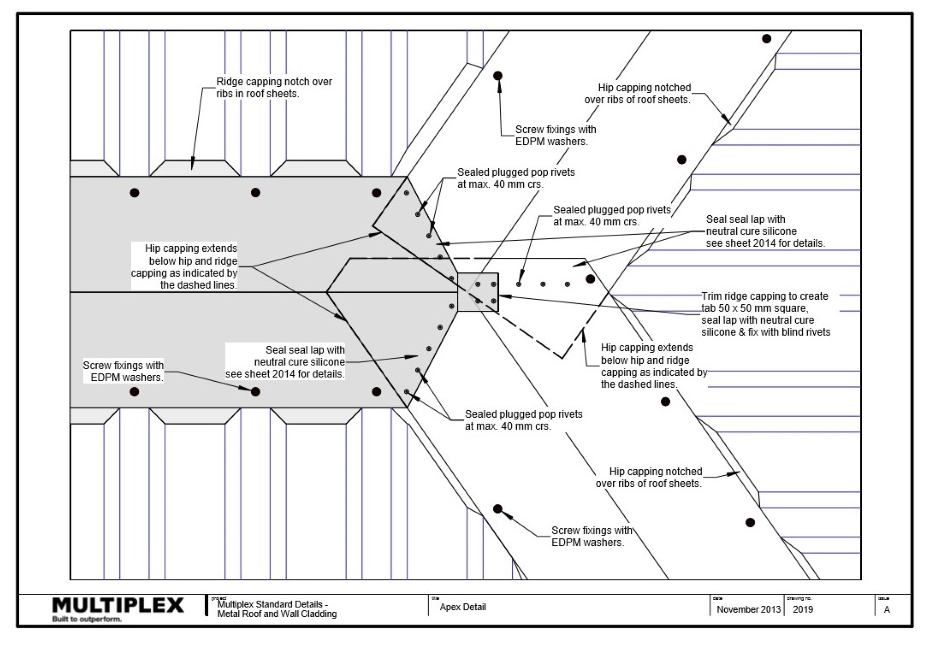
.png)
Click on the image for an enlarged version
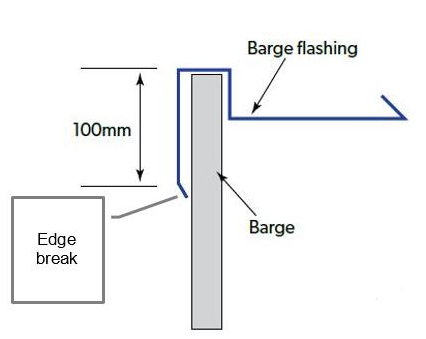
Edge Break – Used in over flashings to provide an edge that pushes the face of the flashing away from an adjacent flat surface. This may be a barge board, flat cladding or the under flashing when applied to an over flashing.
Drip Edge – Used in over flashings to provide an edge that pushes the lower edge of the flashing away from an adjacent flat surface. This may be a barge board or flat cladding.
Flattened – a.k.a. Fold and Crush, usually used as the edge detail for the termination of a cut edge to stiffen and protect the cut from water. It also provides a smaller capillary break than other folds and when used on an under flashing can assist in preventing wind driven rain from bypassing the flashing.
Document Control
Version 2.1, April 2021